Back to top

Started this today/

Created by beerdead beerdead  > 9 months ago, 9 Feb 2014
Register to post, see what you've read, and subscribe to topics.
Ted the Kiwi
Ted the Kiwi

NSW

14256 posts

14 Feb 2014 7:33am
I hear ya. Well you can just drop the % of hardener to give you more time. 1% at 25 degrees normally takes about 20 mins so I just drop it to 0.5% to give me a lot more time and do it early in the morning before the day heats up. The good news today is that its significantly cooler than yesterday! Good luck. Looking forward to seeing the pics
surfbroker
surfbroker

NSW

1489 posts

14 Feb 2014 9:36am
Hey Ted..thanks for that video..I'd often wondered how hard that would be..and it would be, but not as hard as I thought...but like most things done by hand..preparation is the key.
Ted the Kiwi
Ted the Kiwi

NSW

14256 posts

14 Feb 2014 10:04am
Did you see this one on Vanders board?

surfbroker
surfbroker

NSW

1489 posts

14 Feb 2014 12:04pm

Thanks again..I hadn't seen that one either...is it possible to have "neater" colour separation I wonder ??
Ted the Kiwi
Ted the Kiwi

NSW

14256 posts

14 Feb 2014 12:25pm
yes it is but you just have to take it slow and be very careful - as soon as the colour hits the foams it sticks. Patience ! I am sure the pros have this all worked out though. Backyard hackers like me have not ! Swaylocks may hold some valuable info.

Edit - just had a quick look

www.swaylocks.com/groups/tricky-resin-tintfor-me
surfbroker
surfbroker

NSW

1489 posts

14 Feb 2014 5:29pm
Thanks again Ted..that's what I thought..very tricky...
beerdead
beerdead

NSW

433 posts

14 Feb 2014 9:13pm
A little bit each day.

Filling the bottles.


My awesome Mrs (happy Valetines day love) video'd some of this but I don't know how to upload it.
Besides, I've deleted it now. :(
beerdead
beerdead

NSW

433 posts

20 Feb 2014 7:23pm
Filled the bottles with pigmented resin and put them in the fridge. Did the same with the bulk resin to go over the top of the colours. I put a rose tint in 1/2 and lemon in the other other half of the bulk.

Been waiting for a cooler day to laminate but I would have been waiting for months, so I glassed it this morning.
Not too bad, but I have a couple of bubble patches in the knee paddle pad.

It does not look 24 1/2 wide. I reckon it would cope with 25 1/2 wide at 10' long.


thePup
thePup

13831 posts

20 Feb 2014 4:29pm
You've done it sweet mate - you should be proud of that
SP
SP

SP

10982 posts

20 Feb 2014 4:32pm
Great job, looks awesome..
Ted the Kiwi
Ted the Kiwi

NSW

14256 posts

20 Feb 2014 8:29pm
Wow - the beer garden now has a Mexican blanket! Great effort. How did your laps go? Are they free or cut ?
beerdead
beerdead

NSW

433 posts

20 Feb 2014 8:40pm
The laps from the bottom were cut. The top are free.
Unfortunately I got a bit ambitious with the deck and the kneel pad has some air in it.
Oh well. Wax should cover it.

Looking at the pic it doesn't look 10', or 24 1/2".
Next one might be 11' x 26". :D
chrispy
chrispy

WA

9675 posts

20 Feb 2014 6:00pm
That is so,so, so,etc ****in amazing WOW
Sir I will nod my head whenever I see you..master effort...now I know how crap I really am at stuff,at good stuff
beerdead
beerdead

NSW

433 posts

7 Mar 2014 10:41pm
Been somewhat slack with this. Also sanded throught the glass. FIVE TIMES. In the same spot. Once it's gone through it's bitch to reglass the spot and keep the contour.
Oh wel. it is what it is.

On a brighter note, although it's a bit wobbly, I've done my first pinline. I say that loosely, 'cause it's 4.5 mm wide, but it's helped to tidy up the tape line.


beerdead
beerdead

NSW

433 posts

19 Mar 2014 12:42pm
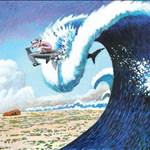
Finally finished. Now need the swell to pop up again. Haven't had a paddle since January!

Has a few lumps, and the glassing was less than desirable, but some lessons learned. Such as using solar res on 6 oz x three layers (kneeling pad). Also be patient about when I hot coat it, and don't do it when the temps 25C. Unfortunately this resulted in some tiny bubbles which didn't rise out of the coat, and would not take the gloss coat in. So it has a few spots where the cutting compound won't come out and speckles it a bit. But overall I'm happy. I just hope it go's.

I like the top rails better than the bottom.


The bottom looks like a mess, but I have a better idea how to address it next time.


chrispy
chrispy

WA

9675 posts

19 Mar 2014 10:02am
Geez,being way harsh on yourself mate...I think it looks cracking,and if it goes half as good for you...well you will be more than smiling
thePup
thePup

13831 posts

19 Mar 2014 10:10am
Select to expand quote
chrispy said..
Geez,being way harsh on yourself mate...I think it looks cracking,and if it goes half as good for you...well you will be more than smiling


yep - think of it as your own personal shapers touch mate ... we like
Tux
Tux

Tux

VIC

3829 posts

19 Mar 2014 2:09pm
Hey bro you have done a cracking job there....love the pin line...one thing I picked up on my last sanding effort is if using a power sander or drill go slow and you will have less chance of a go through or an awwww **** it I as I like to call them
beerdead
beerdead

NSW

433 posts

19 Mar 2014 2:16pm
Absolutely. 400 grit on a SLOW 6" SOFT disc prevents a lot of naughty words.
SP
SP

SP

10982 posts

19 Mar 2014 6:15pm
That's looks good, all the little blemishes just makes it better, you should look at each one with a sense of achievement.
End of posts
Please Register, or first...
Topics Subscribe Reply

Return To Classic site