Back to top

stainless palm weedy

Created by decrepit decrepit  > 9 months ago, 25 Oct 2016
Register to post, see what you've read, and subscribe to topics.
decrepit
decrepit

WA

12802 posts

25 Oct 2016 5:02pm
OK, anybody who's bored with fin construction details blame Keef, I'm doing this at his request.

Basil has sliced me up some more end grain palm, and it's seasoned a bit more since the first one I made, so is a bit lighter.
First thing to do is mark out fin profile.
Palm marked out with Gav's shaped stainless leading edge alongside


Then because the palm has very little cross grain strength, I laminate a layer of 4oz glass onto one face to hold it together while I cut it out and foil the other side.


Once the epoxy's set I can start shaping the first side, possibly get around to that tomorrow.
seanhogan
seanhogan

QLD

3424 posts

25 Oct 2016 7:20pm
can't wait to see the final product !!!!
ka43
ka43

NSW

3097 posts

25 Oct 2016 8:59pm
Oooh yeah baby!!!
keef
keef

NSW

2016 posts

25 Oct 2016 9:37pm
Select to expand quote
decrepit said..
OK, anybody who's bored with fin construction details blame Keef, I'm doing this at his request.


way to go mike you never seize to amaze me
fangman
fangman

WA

1906 posts

25 Oct 2016 8:25pm
Decrepit, I know you have told me before, but what's the benefit of using end grain palm again?
decrepit
decrepit

WA

12802 posts

25 Oct 2016 8:58pm
Select to expand quote
fangman said..
Decrepit, I know you have told me before, but what's the benefit of using end grain palm again?


Apart from the fact that it's free you mean?


The interior of the fin is under compression the exterior is under tension, carbon takes the tension loads, and the palm the compression.
Just like a beam.
Think of the base of a tree it has to support the total weight of the tree, so evolution has produced great compressive strength.

If I had enough of it and Barry could slice it thin enough, it would probably make a great board.
fangman
fangman

WA

1906 posts

25 Oct 2016 9:13pm
Got it.Thanks mate I wonder if anyone had ever done a finite stress analysis on a fin?
decrepit
decrepit

WA

12802 posts

25 Oct 2016 10:02pm
I remember seeing a hole drilled through the top third of a fin with a cable and weight attached, with a huge fin bend, but don't remember any details.
I think Yoyo said that slowy says. there's about 40kg on the fin.
seanhogan
seanhogan

QLD

3424 posts

26 Oct 2016 7:35am
Select to expand quote
decrepit said..


The interior of the fin is under compression the exterior is under tension, carbon takes the tension loads, and the palm the compression.


So we won't see the wood once finished ?
fangman
fangman

WA

1906 posts

26 Oct 2016 7:29am
Select to expand quote
decrepit said..
I remember seeing a hole drilled through the top third of a fin with a cable and weight attached, with a huge fin bend, but don't remember any details.
I think Yoyo said that slowy says. there's about 40kg on the fin.


That would make sense. If you have a 80 kg weight attached to the harness sitting out at 45 degrees to the board, the lateral vector would roughly be 40 kg and the fin has to oppose that load - that would also mean that my fins would need to be able to deal with more than a 40kg load
elmo
elmo

WA

8879 posts

26 Oct 2016 7:43am
Select to expand quote
fangman said..


decrepit said..
I remember seeing a hole drilled through the top third of a fin with a cable and weight attached, with a huge fin bend, but don't remember any details.
I think Yoyo said that slowy says. there's about 40kg on the fin.


That would make sense. If you have a 80 kg weight attached to the harness sitting out at 45 degrees to the board, the lateral vector would roughly be 40 kg and the fin has to oppose that load - that would also mean that my fins would need to be able to deal with more than a 40kg load


Fangy, can I use your scales?

mine don't stop at 80kg
fangman
fangman

WA

1906 posts

26 Oct 2016 5:08pm
No. You need to use something called a 'Weighbridge'
decrepit
decrepit

WA

12802 posts

26 Oct 2016 5:40pm
Select to expand quote
seanhogan said..
decrepit said..


The interior of the fin is under compression the exterior is under tension, carbon takes the tension loads, and the palm the compression.


So we won't see the wood once finished ?


If you see the wood there's something seriously wrong!!!!!!!!!!!!!!!!!!!
decrepit
decrepit

WA

12802 posts

26 Oct 2016 6:02pm
OK, got a bit more done today.


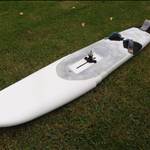
cutting out the profile with jigsaw.


Here I use a marking gauge to score the center line into the fin edges.


For shaping I use a small right angle grinder, with long even strokes. This is the first chamfer, I take the leading and trailing edges down to the center line.


I've marked the thickest part of the foil along the fin, then with successive strokes of the grinder shaped the chamfer up to that line.


With the profile gauge and 80 grit sandpaper on a softish block, I've finished off the shaping, doesn't have to be super accurate at this stage, there's a lot to go on top yet.
I've just made sure it's under an 8% foil, as I want it to end up at 9%.


next step, epoxy some carbon over it, note carbon that doesn't go the full length of the fin is tapered off, not cut square across the fin! This is really important. The first timber carbon fin I made snapped of near the tip, because i didn't think there was much load up there and cut a layer there off square .


Once I've wet out the carbon, I smooth some plastic over it, then place some foam rubber, a plank and some weights.


This squeezes out any excess resin and saves having to sand lumpy carbon.


Stretchy
Stretchy

WA

1045 posts

26 Oct 2016 6:57pm
Great pictorial and explanation of your build process Mike. Loving it!!
decrepit
decrepit

WA

12802 posts

26 Oct 2016 7:14pm
Just thought I'd add a bit about the grinder.


Note that this has a flat sanding disc on it, which are a bit hard to find these days, most shops here are only selling flap wheels.


These things, have a convex face, and I find them very difficult to shape with. They last very well and are great for most applications, but if you try shaping with them, don't be surprised if the results aren't as good as you hoped.
decrepit
decrepit

WA

12802 posts

27 Oct 2016 7:27pm
first step today was trim the excess carbon from the edges of the fin.


You have to be very careful at this stage, the carbon filaments are very stiff and sharp. No hasty movements, or you could get a nasty jab. I use the hacksaw to trim off the excess, with a rubbish bin directly underneath.

Next is to mark out the trailing edge bead, and the bolt channels. Then remove the palm and replace with a bog mix.


Again the marking gauge marks the line and a small wood chisel removes the palm.


Here I use a multitool and chisel to remove the palm.

I've also bogged it up, pics of that later.
decrepit
decrepit

WA

12802 posts

30 Oct 2016 4:51pm
sanded back the bog,


Then laminated 4 full carbon layers and 4 progressively shorter ones, so there's 8 layers at the base and 4 at the tip.

Next stage is to shape the leading edge of the stainless.
I have to do it before attaching it to the fin, as the heat from the grinding it will melt the epoxy holding it on.

The block at the top of the pic is the soft sanding block I use for getting the concave trailing edge.
Because it's a little bit flexible, you can apply pressure to a small area. I keep the pressure just back from the trailing edge, makes a nice even concave.
decrepit
decrepit

WA

12802 posts

3 Nov 2016 5:51pm
Got into the stainless today. Despite my previous comment about not liking to shape with the flap wheel. Today it was quicker getting rid of lots of excess stainles, so I roughed out the leading edge foil with that.


Then changed to the plain sanding disk to finish off with.


Next step, is to cut out the fin.


Then tack the stainless onto the fin with 10min vital steel epoxy.


This is a bit of an experiment, in the past I've tacked the stainless on before the carbon, but I've had distortion problems with some of those. My theory is once the carbon is on, it shouldn't move no matter what.

So next step is to sand the fin back to the stainless rebate and glass it on, with narrow strips of glass. This will also keep the stainless and carbon separate, there's been the odd patch of rust on older stainless leading edges, not sure if this is just bad stainless or electrolysis.
fangman
fangman

WA

1906 posts

3 Nov 2016 6:26pm
decrepit said..
Got into the stainless today. Despite my previous comment about not liking to shape with the flap wheel. Today it was quicker getting rid of lots of excess stainles, so I roughed out the leading edge foil with that.

Just to add to your comment on flap wheels - I had the same problem with the concavity, but then I found the Bosch ones which are nice and flat, but you still have to be careful as they rip a lot of stuff off really fast, including bits of finger :-)
keef
keef

NSW

2016 posts

3 Nov 2016 10:05pm
Select to expand quote
decrepit said..
, there's been the odd patch of rust on older stainless leading edges, not sure if this is just bad stainless or electrolysis.


mike I showed my stainless fins to a friend of Gary Warrens a marine engineer who inspects his boats and an awesome speed sailor , he said I need to cover the carbon with fiberglass or it will cause electrolysis , my fins are fine but I haven't been doing a lot of sailing this year
now I come to think about it , I had some barrel nuts made from stainless and there's rust
decrepit
decrepit

WA

12802 posts

3 Nov 2016 9:30pm
Select to expand quote
keef said..
decrepit said..
, there's been the odd patch of rust on older stainless leading edges, not sure if this is just bad stainless or electrolysis.


mike I showed my stainless fins to a friend of Gary Warrens a marine engineer who inspects his boats and an awesome speed sailor , he said I need to cover the carbon with fiberglass or it will cause electrolysis , my fins are fine but I haven't been doing a lot of sailing this year
now I come to think about it , I had some barrel nuts made from stainless and there's rust


The stainless bolts in my boom also have a brown stain, it's not flaky like rust may just be the estuary water.
kato
kato

VIC

3513 posts

4 Nov 2016 7:31am
Mike, be friend a floor sander as they have lots of sandpaper off cuts. Perfect for cutting 4" circles for the grinder. What out for the 40 grit
AUS 808
AUS 808

WA

510 posts

4 Nov 2016 11:32am


Select to expand quote
decrepit said..


keef said..


decrepit said..
, there's been the odd patch of rust on older stainless leading edges, not sure if this is just bad stainless or electrolysis.


mike I showed my stainless fins to a friend of Gary Warrens a marine engineer who inspects his boats and an awesome speed sailor , he said I need to cover the carbon with fiberglass or it will cause electrolysis , my fins are fine but I haven't been doing a lot of sailing this year
now I come to think about it , I had some barrel nuts made from stainless and there's rust


The stainless bolts in my boom also have a brown stain, it's not flaky like rust may just be the estuary water.


Mike, it's probably just tea staining.

You can also get contamination from the sanding discs & grinding wheels, you will notice they have special ones for stainless.

I never bothered because they are more expensive & everything I did was passivated after fabrication.
decrepit
decrepit

WA

12802 posts

4 Nov 2016 5:36pm
Select to expand quote
AUS 808 said..


>>>>>>


Mike, it's probably just tea staining.

You can also get contamination from the sanding discs & grinding wheels, you will notice they have special ones for stainless.

I never bothered because they are more expensive & everything I did was passivated after fabrication.


Ahhh so that's why there's special stainless wheels, I thought it was something to do with the way stainless abraded. Yep, that's possible I use stainless cut off wheels but standard sanding disks.
decrepit
decrepit

WA

12802 posts

7 Nov 2016 7:33pm
Here's a pic of cutting glass out for attaching the stainless.


I pull one thread out of the cloth as a straight line guide along the weave.
Cut several lengths of graduated width, so that the cloth tapers into the foil.
GeoffS
GeoffS

NSW

49 posts

10 Nov 2016 9:23pm
Mike, the rust colour on your bolts and probably Keefs leading edges is rust.
Stainless steel is only stainless when there is oxygen present to allow chromic or chromium oxide to form on the surface. Cant remember exactly which. After welding stainless they use a nitric acid based paste to remove any free iron which has bubbled to the surface during the weld process to keep it stainless.
When you exclude oxygen such as a bolt going through a hole then the stainless steel will corrode below the surface and show up as a brown ring where the bolt breaks into the air.

When you exclude oxygen from stainless steel it actually becomes more easily corroded than plain steel. Yacht moorings are not stainless for this reason as the lower they are into the mud etc on the bottom the less oxygen.
A friend once used an old 18 gal keg filled with concrete as a temporary marker buoy, pulled it up after 3 months and the keg was almost gone.
decrepit
decrepit

WA

12802 posts

11 Nov 2016 2:25pm
Very interesting Geoff, but it's a bit confusing, isn't rust the combination of oxygen with iron? If there's rust there must be oxygen.
Shifu
Shifu

QLD

1994 posts

11 Nov 2016 4:57pm
Yep, stainless does rust. Once you start looking you'll set it in lots of places.

Re sharp carbon fibre - I have just had sliver take over a month to fully emerge from the end of my finger. It had gone right through the finger from one side to the other. I tried to pull it through but it broke off inside. After that it was too fine to see or dig out, but it was painless after the first day and slowly worked its way out.

keef
keef

NSW

2016 posts

11 Nov 2016 7:16pm
Select to expand quote
GeoffS said..
Mike, the rust colour on your bolts and probably Keefs leading edges is rust.


yep its rust but only seams to be on the surface of the nuts and under the stainless on the fin but its not a problem
keef
keef

NSW

2016 posts

11 Nov 2016 7:40pm
mike I mite have an easier way to do the stainless
maybe make a mold as its a very simple process with a recess in the mold for the stainless, you could use the finest flat piece of stainless to lay up in the center of the fin, after the layup pop the fin out and cut down to the stainless for the width of your leading edge and glue it on or glass it in


as you can see the fillet from the spillage well from the mold the same could work with the stainless

as you can see the spillage well on the mold
Loading more posts...
Please Register, or first...
Topics Subscribe Reply

Return To Classic site