Well it's your lucky day, i repray all my board after they have gotten a few scratches on them, i also run a board repair and airbrushing business.
This is what you will need to do....
Firstly after you have peeled the factory graphics off, the grip comes with it and saves alot of sanding, but you will need to run a new blade, stanley knife is fine around the foot pads as the stick on graphics will be under there too and you don't want to peel your pads off as you can just tap them up while painting.
Next you will have to sand what non-skid is left off, you can use 320 or 400 sand paper.
If your board needs repairs, now is the time.
Now paint the repairs white (prepair with 400 sand paper) or what ever the base colour of the board is, or you can change the colour at this point if you like, i always use white as a base, one tip here is to use a 2K paint for anything thats not going to be under the no-skid, ie bottom and rails, if you are fully respraying the board paint it all in 2K, if you are just touching up the white under the non-skid just use Acrlic car paint.
Now the fun part,(after you have sanded the whole deck with 400 to 600 sand paper) work out your design, i love the old flame job, tape up what you want and spray with Acrylic Auto paint (Don't use enamel paint, it's the worst paint in the world, and will give you heaps of troubles down the track) i use an airbrush or small touch up gun to do a larger area then detail with my airbrush, don't worry about going onto the rails with your design i'll explain why in a minute.
Once you have finished your design, unmask it to see if it needs something else, shadows or what ever, even sign it if the design looks good.
This step is important, use only 2K clear coat, spray the deck of the board with 2 good coats of clear right around the rails, i prefer not to mask off the bottom of the board and let the spray get some of it, just making sure the rails are done, this is where your graphics on the rails will get a protective coat.
Once your clear coat has dried you can mask up the outline of the non skid, covering the rails with paper.
Next is applying the non-skid, use the same clear coat as before, and the best grip to use is Deck Dust, i use the stuff made by fiberglass hawaii, you may be able to buy some of a custom board builder, if you can it's well worth the effort.
Applying the non-skid, there are 2 ways of doing this, 1 is to mix it with the clear and spray it onto the board, this requires a gravity feed spary gun with at least a 2mm nossel, and you have to aggitate it as you go to stop the gun clogging, or the other way is easier, spray a good coat of clear onto your board and sprinkle the non-skid onto the wet clear, you can use an old milo tin with fly screen stretch over the top to get it even, like an oversizes salt shaker or i just kinda throw it in the air over the board so it goes on even.
unmask the board and you have factory like grip that is see through, it goes clearer once wet.
Last step, flip the board over,(once the paint on top has fully dried of cause) grab some wet and dry sand paper 600 works well and wet sand the bottom to remove any overspray that made its way onto the bottom, don't worry about sanding too much off, the sanded through look is all the go these days, and only sand along the board not across it. The reason i don't mask the bottom off is to eliminate a paint edge on the rails.
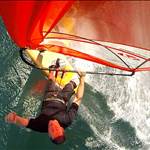
No take some photo's and get on the water..
if you would like to see some finished ones have a look at my profile i have a few photo's of different boards i've done..
Cheers P.C
 qwerty
> 9 months ago, 29 Jun 2008
qwerty
> 9 months ago, 29 Jun 2008