HUGE DISCLAIMER:
If you do this, you might die! Because I am not a safety professional and am a complete amateur. This was a project I did because I'm too poor to buy real parts. If you can afford real parts, you should buy them! I have no idea what I'm doing, this is just a first-principles DIY project. Don't do this!
-------
My experiences with it:
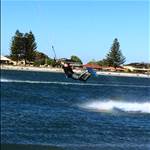
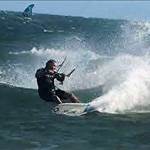
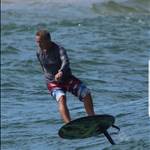
I started slow, and just replaced the connector part on my harness to begin with. I've been out twice so far with it, and haven't had any issues. But I should stress that I ride low-wind foiling, with no jumps. So I'm not subjecting my DIY equipment to massive amounts of pressure or stress.
I've just replaced the main ropes on the bar today and haven't tested them yet. So I will report back once that works/fails.
--------
Ok, these are the three parts that you might want to replace. The top two piece of rope connect to the middle two lines of your kite, and get passed through the bar hole. They receive the most wear and tear of any piece on the bar. I think this costs around 130 USD.
The bottom piece is the part that connects to the harness. It also receives a decent amount of wear and tear. I think it costs around 70 or 80 USD.

This was my original setup. I didn't like this because:
1. The SS rings didn't slide very well on the rope
2. The SS rings wore down my blue rope rather quickly
3. I found the BRM connector was getting weakened at the point where it joined to the SS rings (I suspect it was because the SS rings shifted a lot)

This is my current setup now:
You can see that I've replaced the two separate BRM pieces (which allowed adjustable arm lengths) to one single piece. This was because:
1. I always rode it on the lowest setting and never changed it (so adjustability wasn't needed)
2. It reduced the wear and tear (no joinage points or knots to add stress or weaken the rope)
I also replaced the SS rings with frictionless widgets (?) (I forget what it's called).
Anyway, to make this, I took 4mm dyneema rope and marked the following lengths on it:
15cm (splice tail)
12cm (this is the loop you can see in the right side of the picture)
20cm (middle piece of the rope)
4cm (the loop that holds the SS pointy stick on the left side of the picture)
15cm (splice tail).
Then you need to sew it all to keep it down nice and tight.

The SS pointy stick I'm referring to is the one on the right in the picture below.
Basically, you do an empty eye splice first, then you do an eye splice around the SS pointy stick below. You then tie 2mm shock cord through the eyesplice that contains the SS pointy stick, and loop it around the black ball. I then used a double Fishermans loop to tie it off.

So that was 70 USD saved. I now need to save another 130 USD with the other two pieces of line.
It was a very similar concept. Just eye splices and these QRs. The key part here is to take it very slowly and methodically.
You start off with replacing the NON-QR line, without burying the splice tails (as you WILL need to reside the splices once you've realised that you made them the wrong length).
So for the non-QR line, you have the following lengths:
20cm (splice tail)
12cm (eye loop) -- do this splice first
67.5cm
4cm (eye loop - put SS ring through it) -- do this splice second
20 cm (splice tail)
So once you've made this line, you replace it very gently on the bar, leaving everything loose and nothing tied in. I think you need to slip the black ball down this line at this point.
For the QR line, you have the following lengths:
20cm (splice tail)
12cm (eye loop) -- do this splice first
67.5cm
4cm (put SS spike through it) -- do this splice second
20cm (splice tail)
Again, replace it very gently on the bar, leaving everything loose and nothing tied in.
Now you can figure out if your lines are the same length. If they aren't, resize the 67.5cm lengths by moving the 4cm eye loops up/down on the appropriate line(s).
Now you should have something that looks like this:

If everything works, you can now put the ends of your splices into the rope and probably sew them up.
You can then tie 2mm shock cord around the ball/through the eye loop (NOT THE HOLE OF THE SS SPIKE -- IT IS NOT BIG ENOUGH) to make it a proper QR.
You should then test this a lot to see if it actually works, or if you will die/lose your kite when using it!
----------
The parts used in this project are:
4mm dyneema rope (took about 2m of rope at around 5 AUD/m)
"Black balls" PMP 272N (2 at around $3 each)
Rolled swage J/G 37660 (2 at around $3 each)
Round SS ring 4mm x 25Ø (2 at around $3 each)
-----------
Any comments or suggestions would be welcomed.
 Plummet
> 9 months ago, 28 Sep 2016
Plummet
> 9 months ago, 28 Sep 2016