Today was just like Christmas again!
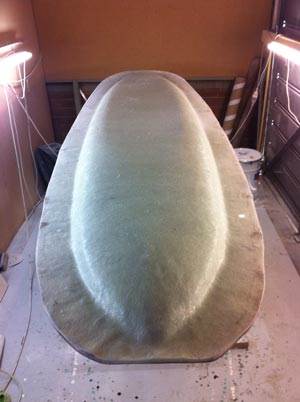
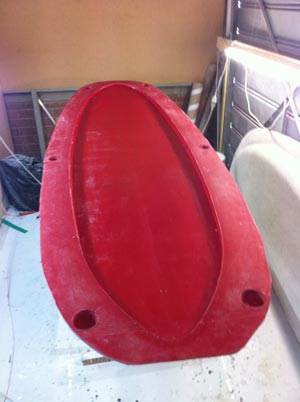
I cracked open the mold of a new Martin Love designed board. All that the mold needs is a light sand and then a good polish, start up the machine to cut some cores and start playing with constructions.
It has been a few years since I molded boards, so we shall see what happens
Are you willing to describe how you build these boards? Are you laying up inside the mold and then vacuum bagging divinycell onto it?
What about the core? Do you mill styrofoam to shape and compress it a little in the mold?
Or is there some other secret process that makes this a good way to build a board?
It's a Slalom Board, 240 X 59 X 92.5 litres. Flat V into light double concave with side flats, nothing controversial. Stuart asked me if I had some designs as he wanted to build a mold, I had been playing in computer la la land so sent it his way. Should be a nice , fast high wind board.
Hey Stuart, had a chance to look at that file I sent you??
Select to expand quoteFormulaNova said..
Are willing to describe how you build these boards? Are you laying up inside the mold and then vacuum bagging divinycell onto it?
What about the core? Do you mill styrofoam to shape and compress it a little in the mold?
Or is there some other secret process that makes this a good way to build a board?
It's pretty interesting how Cobra do it. They still can't get it right though, and the molds they use are baller.
Select to expand quotebarn said..FormulaNova said..
Are willing to describe how you build these boards? Are you laying up inside the mold and then vacuum bagging divinycell onto it?
What about the core? Do you mill styrofoam to shape and compress it a little in the mold?
Or is there some other secret process that makes this a good way to build a board?
It's pretty interesting how Cobra do it. They still can't get it right though, and the molds they use are baller.
How do they do it? I heard some mention of concrete fibre-glass reinforced molds, but I don't know how they use it. Is this for all boards, or just some?
With computer accuracy, you would think you could get the core of the mold close to perfect my machining it, so I wonder if this helps.
Thanks Martin for giving the dimensions. I have looked at the model and will email you
The molds I have seen or worked on are generally the vacuum method. There are even two versions of these, the first system is the simple old vacuum bag and the second is to seal the mold and then vacuum the molds together. The most important part of this is to have the base of the mold reinforced to avoid any flex or twist.
There are also compression molds that use clamps and bolts to apply the pressure.
The fibreglass concrete molds that you are talking about are used to create the core that is either blown eps or PU that need the strength to hold the pressure of the expanding foam
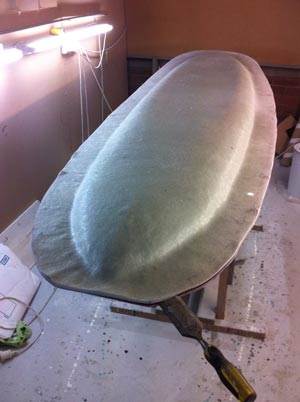
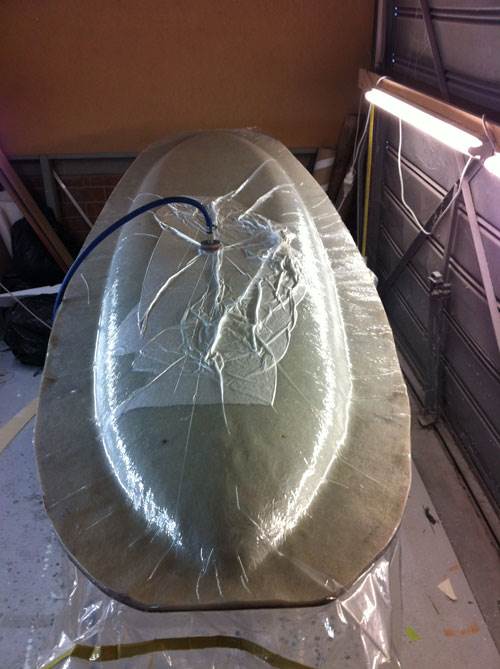
For this board I will cut the cores on my cnc machine, so the mold will only be used put it all together. There will be three different construction method that I will be trying
1/ hd foam + core bagged into the mold, reshaped, fittings added and top and bottom laminated as a custom board
2/ bottom laminated into the mold + hd foam + core bagged, fittings added and top laminated as a custom board
3/ Single shot - finished out of the mold
Stuart
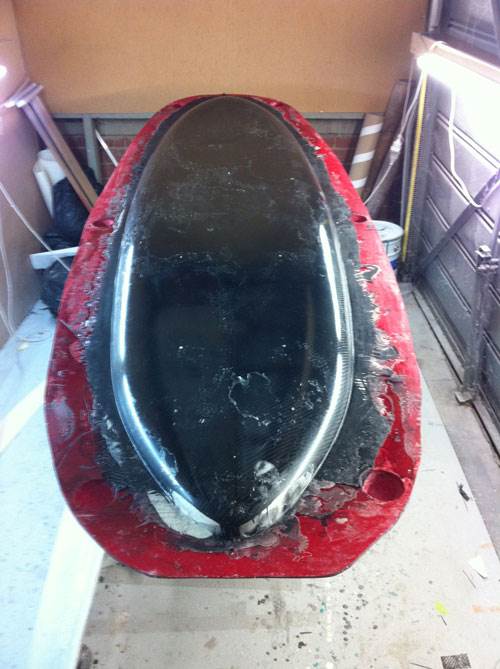
looks great stuart, theres a lot of glass in that mould, did you use vinylester or ploly
Thanks Stuart and Kimba. I never knew how it was done, but it seems relatively simple... Well, if you know what you are doing anyway ![]()
I think to date it has taken 20 litres of epoxy and around 75m of CSM glass. The base has most of it to make it stiff
Does anyone know what they call the process when putting the artwork on in that u tube vid ? Looks like goes on after painting and before deck grip .
Select to expand quotedweller said..
I think to date it has taken 20 litres of epoxy and around 75m of CSM glass. The base has most of it to make it stiff
the mould looks great stuart and a lot of work, is there any particular reason why you used epoxy for the mould,and what did you use for a tooling gel if you used epoxy,
Hi Keef
The red bottom is tooling gel & polyester resin, but i had forgotten how much it smelt and with a new baby in the house I thought it better to switch to epoxy for the top (had plenty of the cheap stuff).
To make an epoxy gel coat is simply graphite powder and Cabosil to thicken.
The top actually has a better surface finish than the tooling gel coated bottom
ill agree with the cabosil , I priced some tooling gel at $50lt at 2lt minimal , its a bit pricey, a good gel base is also cabosil and bog powder, the bog powder is compounded with the second cure and sets rock hard and extremely hard to sand, so would be good with the silica
I would imagine the epoxy would be better for a board because you would need a bit of flex when your getting the board out
are you going to put some legs on it , I used cardboard for my fin moulds , it also strengthens the center of the mould
any chance of taking a vid when you open the mould , it would be good to see ![]()
Yeah epoxy tooling resin is too expensive and at my local you have to buy 4L.
I have used West 105 with aluminium powder (just like diecast dinki cars ![]() ) and had a really good result.
) and had a really good result.
But would be impractical for a larger mould, you would use about $50 worth of ally powder
Select to expand quoteMark _australia said..
Yeah epoxy tooling resin is too expensive and at my local you have to buy 4L.
I have used West 105 with aluminium powder (just like diecast dinki cars ![]() ) and had a really good result.
) and had a really good result.
But would be impractical for a larger mould, you would use about $50 worth of ally powder
Where do you buy aluminium powder? and magnesium ribbon... and...
Select to expand quoteFormulaNova said..
Where do you buy aluminum powder? and magnesium ribbon... and...
I have some stainless powder and was told its about $100 a kg, dale when your sanding either glass or bog save it and stick it in a shaker,eg( I have a stainless salt shaker)mix up some silica and resin and add the glass or bog dust to the mix, what you have is the glass and bog dust getting a second cure, it's then a compounded and a supa hard mix and heaps cheaper![]() if your making a mould make the mix up the day before and let it degas, then add the hardener when you want it, if your using a polyester mix the hardner in the glass filings or bog can start the cure, not to the extent that it will go off but it will thicken if left over 24hrs
if your making a mould make the mix up the day before and let it degas, then add the hardener when you want it, if your using a polyester mix the hardner in the glass filings or bog can start the cure, not to the extent that it will go off but it will thicken if left over 24hrs
Hi All
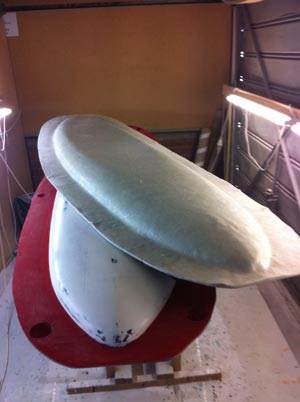
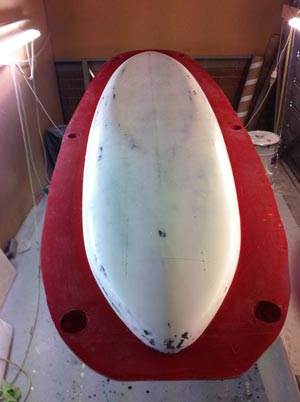
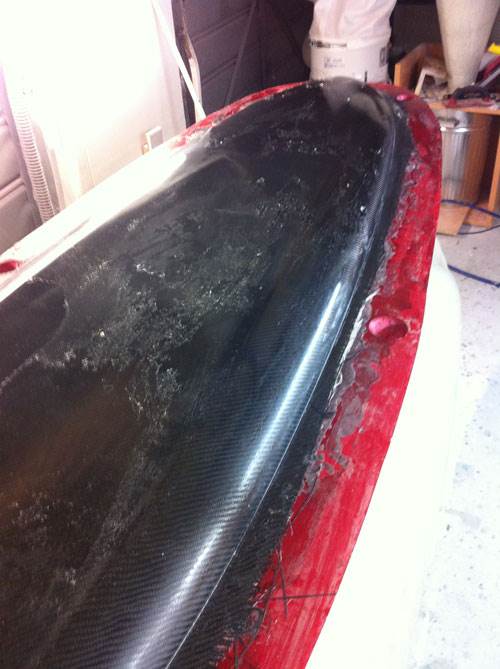
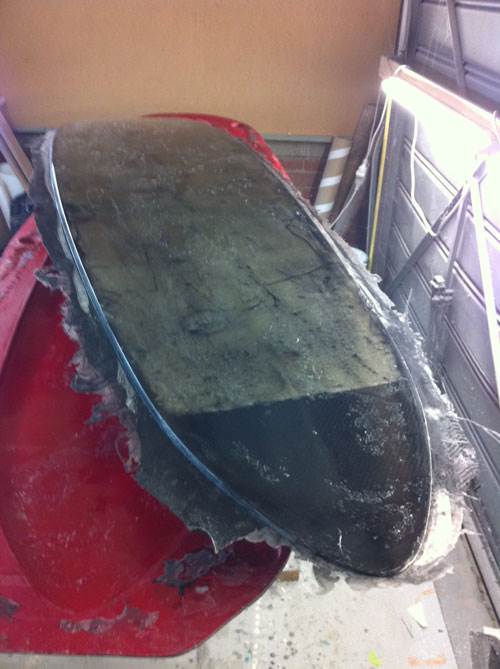
Just thought I would update you on the first Martin Love board out of the mold.
It came out perfect. It just needs to be de-seamed and carbon tape along the rails, find the fittings and then a quick sanding/colour coat.
Ready to go
Stuart
looks great stuart, I like the vacuum idea, doesn't seam to be any air bubbles, looking forward to see the cutouts![]()
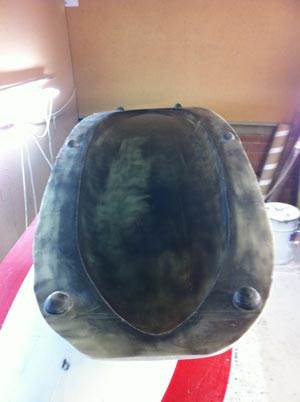
That surprised me too! Both sides were air bubbles or pinholes free.
There are no cutout's on this one as it is only 59 wide, but cutout's would not be an issue to mold.
I have to finish Martin's new board first and then I will make another one of these but this time in full carbon
Select to expand quotedweller said..
There are no cutout's on this one as it is only 59 wide, but cutout's would not be an issue to mold.
no air bubbles or pinholes = no air
no cutout's under 600 wide, (different cutout's) take this baby for a spin at primbee ,you mite change your mind, 280 at 580![]()
"edit" how did you find the gelcoat you made compared too the tooling gel
Do you shape a blank foam first or did you just inject urethane foam into the mould?
Hey Dweller, nice work. What do you think your time spent from whoa to go is excluding tooling?
Time is a bit of a hard one as I tend to work in days rather than hours (as most of the processes take a day to dry)
For a custom board there would be 18-20 processes and end up beings 20 days of build time.
With the molded board it seems to be similar time involved in getting the board ready to go in the mold, but where the savings are made is in the drying times as they are all rolled into a single process.
The board then requires finishing, but I would expect the total production time for a finished board will be reduced down to 7 days.