Hey I would be interested in talking to anyone who has used these panels to build something.
I am trying to work out the best way to build a new bridgedeck roof for my small catamaran. The old one is just too low.
Was hoping someone here could answer some questions about the pros/cons of using this system?http://duflex.com.au/duflex2/
I built the hardtop for our seawind 960 out of 25mm poly core with a layer of 600 either side and it worked well
easily took the weight of six teenagers jumping off it into the water
Don't go Duflex, it is straight and flat and you want curves.
Two reasons. Flat roofs are ugly and they are weaker.
My cat has Duflex, ply, foam, Nomex, and cedar in it. Another one of my cats has polycore in it too. I love Duflex - especially if I can get it cheap but it hurts to buy it. But in this situation it is a bad choice.
When I put a new cabin on Kankama I worked out where I needed sitting headroom and where I needed standing headroom. Standing only at the back, to go from side to side and at least sitting everywhere else. It has worked out well and I like the look. The roof is curved. It has about 300 mm of curve sideways and about 200 mm fore and aft. Even the sides have a bit of curve although you could do these in Duflex which is what Schionnings do.
Like Radar said you need about 15-25mm core - foam or polycore - and about 600 gm biax or double bias over and core. Then put in nice stiffening pieces where you can. It aint rocket science.
My new cabin took about 4 weeks to make - full time. If you are clever you may be able to do it off site but this will be hard. It may pay to make a jig that fits the boat and build to that. Don't do it on the water.
Polycore is cheaper than foam. If I can get foam for a good price I would always go foam. It is nicer to work than polycore and has better strength too.
Let us know what you do
Phil
Select to expand quoteKankama said..
Don't go Duflex, it is straight and flat and you want curves.
Two reasons. Flat roofs are ugly and they are weaker.
My cat has Duflex, ply, foam, Nomex, and cedar in it. Another one of my cats has polycore in it too. I love Duflex - especially if I can get it cheap but it hurts to buy it. But in this situation it is a bad choice.
When I put a new cabin on Kankama I worked out where I needed sitting headroom and where I needed standing headroom. Standing only at the back, to go from side to side and at least sitting everywhere else. It has worked out well and I like the look. The roof is curved. It has about 300 mm of curve sideways and about 200 mm fore and aft. Even the sides have a bit of curve although you could do these in Duflex which is what Schionnings do.
Like Radar said you need about 15-25mm core - foam or polycore - and about 600 gm biax or double bias over and core. Then put in nice stiffening pieces where you can. It aint rocket science.
My new cabin took about 4 weeks to make - full time. If you are clever you may be able to do it off site but this will be hard. It may pay to make a jig that fits the boat and build to that. Don't do it on the water.
Polycore is cheaper than foam. If I can get foam for a good price I would always go foam. It is nicer to work than polycore and has better strength too.
Let us know what you do
Phil
Phil thats brilliant. Just the kind of advice I was hoping to find! Building a Jig on the mooring and then taking the jig back to the workshop is genuis. I thought of making draft panels out of plywood on board but thats not nearly as effective as making a proper Jig that I can transfer to the workshop, and build around.
I was doubtful that I could make it on the water but I couldn't think of a good way to transfer the profile to the workshop. And the answer was staring me in the face the whole time! Thanks!!! All I need now is a shed load of plywood :) Another concern: Do I need to reduce the tension in the rigging before removing the old roof? And then re-tension once the new roof is installed??? Or is it unlikely to be a factor?
So I am a little unclear: did you use Polycore for your project? And when you say Foam, is there a specific brand to look for? It does need to be strong enough to walk on to stow the main etc etc.
I was under the impression that with Duflex I could bend it by kerf-cutting the inside skin of the laminate and then gluing back together? Do other products flex more easily or you still need to cut the inside layer of laminate and re-glue to make the curve?
Sorry for all the questions but I am really excited to do this project. It will transform the way we use it.
No worries with the questions - talking boats is good fun.
Duflex can be kerfed but will then bend in only one direction. I would recommend that you bend the cabin top both ways - compound curved.
Here is how I would do it.
Slacken off rig - I did that when I built my new cabin. I then chopped off the old "thing" that grew when cruising. Kankama was low and fast for a few days. You do not want to build in the beam deflection.
Set up a jig. I would try to keep the sides low and build up from these. You do not need full headroom all of the way across the saloon. I have good headroom in the middle that starts to decline as I get ready to duck into the hulls anyway. It allows me to pull the cabinsides down more than if I wanted full headroom all the way. Your smaller cat will need more compromises.
One design spiral I dealt with was the cat cabin problem. I really don't like sailing most cats. The cabins are huge and you can't see over them unless you stand on a box or similar. I can't stand that - I was brought up on monos and dinghies in which you could see. Hence one criteria was to see over the cabin - so I was very careful to balance inside headroom with cockpit vision. Keeping the cabinsides low helped in this regard.
So get some scrap ply and some sticks, battens, maybe a hot glue gun or tape and get out on the boat and move around. I worked out where I needed the sitting headroom, where winches would go, headsail tracks etc. I worked out where I could put reinforcing struts from the deck up to the cabin and these helped me define the structure.
Cut the sides and then use the struts and the sticks to define the structure. Rough is fine. You will have bendy sticks taped down everywhere but eventually work out what you can deal with.
Then you need to get out some string lines and more scrap. Measure the inward cant of the cabins sides. Measure the crown of the cabin top. If you want to do this well then transfer these curved lines to some chip board and cut them out. You are making frames.
Screw the frames to the cabin sides and you should have a pretty accurate jig. When you are happy screw lots of gussets in to hold all the angles in. Because I made my new cabin in the yard I didn't have to do the next bit but you will have to take the jig apart carefully and put it back together at home. By the time you get to this stage you will be fine.
The the jig becomes your mould. Replace the sides with duflex or foam. Lay the 15mm polycore or H80 foam over the mould. You will have to trim the edges of each sheet. Hold it down with screws. Then go inside with epoxy and put dabs of filler onto the jig and foam to glue the foam to the jig - just small dabs every 300mm or so. Pull screws out.
Fill screw holes from the outside with epoxy filler. Add any extra foam needed at the back edge for example to make it thicker - and stop water dripping into the cockpit. Put ply under winch spots and sail tracks. Then get some nice 600 biaxial fabric. You can use polyester but I always just use epoxy as my boat is strip cedar. Smooth the fabric out and then pour epoxy onto the fabric. Work in with a squeegee.
If you are really clever you will have saved the offcuts from the MDF (actually better than chipboard) frames. Dab these onto the cured top of the cabin. Turn cabin upside down. Tap jig free. Glass inside with 600 again. You can glass upside down - I had to - but it is tricky.
Pretty close. Shouldn't need jig now - it should be stiff. Attach headsail tracks etc. I didn't buy tracks. I put PVC tube onto my cabin and glassed over. Then use a 4 inch grinder to make notches in tube every 50mm. Stainless rod through tube. Stitch with unis through entire laminate to ensure tube doesn't rip off. (This works well but needs explaining)
Then - Phew - The get a notched trowel. Make up some epoxy filler and smear it over the glass. Pull trowel across leaving beads. When all cabin covered - get 30mm thick scrap foam 1m long and 120mm wide - with 40 grit paper band sweep across the cabin - at 30-45 degrees to the length of the board.
When all is smooth fill in grooves with more filler. Then sand again with 80 grit. Then two coats of epoxy. When the second one just leaves a fingerprint roll on some high build primer. Then top coat.
There is more but this will get you started. Thicker foam is stiffer. Mine is 15 and 25mm but your boat is smaller and cabin smaller so 15 would probably be fine. Curves will help provide stiffness too.
Always welcome to come up to the lake and I can show you some more tricks.
cheers
Phil
Select to expand quoteKankama said..
No worries with the questions - talking boats is good fun.
Duflex can be kerfed but will then bend in only one direction. I would recommend that you bend the cabin top both ways - compound curved.
Here is how I would do it.
Slacken off rig - I did that when I built my new cabin. I then chopped off the old "thing" that grew when cruising. Kankama was low and fast for a few days. You do not want to build in the beam deflection.
Set up a jig. I would try to keep the sides low and build up from these. You do not need full headroom all of the way across the saloon. I have good headroom in the middle that starts to decline as I get ready to duck into the hulls anyway. It allows me to pull the cabinsides down more than if I wanted full headroom all the way. Your smaller cat will need more compromises.
One design spiral I dealt with was the cat cabin problem. I really don't like sailing most cats. The cabins are huge and you can't see over them unless you stand on a box or similar. I can't stand that - I was brought up on monos and dinghies in which you could see. Hence one criteria was to see over the cabin - so I was very careful to balance inside headroom with cockpit vision. Keeping the cabinsides low helped in this regard.
So get some scrap ply and some sticks, battens, maybe a hot glue gun or tape and get out on the boat and move around. I worked out where I needed the sitting headroom, where winches would go, headsail tracks etc. I worked out where I could put reinforcing struts from the deck up to the cabin and these helped me define the structure.
Cut the sides and then use the struts and the sticks to define the structure. Rough is fine. You will have bendy sticks taped down everywhere but eventually work out what you can deal with.
Then you need to get out some string lines and more scrap. Measure the inward cant of the cabins sides. Measure the crown of the cabin top. If you want to do this well then transfer these curved lines to some chip board and cut them out. You are making frames.
Screw the frames to the cabin sides and you should have a pretty accurate jig. When you are happy screw lots of gussets in to hold all the angles in. Because I made my new cabin in the yard I didn't have to do the next bit but you will have to take the jig apart carefully and put it back together at home. By the time you get to this stage you will be fine.
The the jig becomes your mould. Replace the sides with duflex or foam. Lay the 15mm polycore or H80 foam over the mould. You will have to trim the edges of each sheet. Hold it down with screws. Then go inside with epoxy and put dabs of filler onto the jig and foam to glue the foam to the jig - just small dabs every 300mm or so. Pull screws out.
Fill screw holes from the outside with epoxy filler. Add any extra foam needed at the back edge for example to make it thicker - and stop water dripping into the cockpit. Put ply under winch spots and sail tracks. Then get some nice 600 biaxial fabric. You can use polyester but I always just use epoxy as my boat is strip cedar. Smooth the fabric out and then pour epoxy onto the fabric. Work in with a squeegee.
If you are really clever you will have saved the offcuts from the MDF (actually better than chipboard) frames. Dab these onto the cured top of the cabin. Turn cabin upside down. Tap jig free. Glass inside with 600 again. You can glass upside down - I had to - but it is tricky.
Pretty close. Shouldn't need jig now - it should be stiff. Attach headsail tracks etc. I didn't buy tracks. I put PVC tube onto my cabin and glassed over. Then use a 4 inch grinder to make notches in tube every 50mm. Stainless rod through tube. Stitch with unis through entire laminate to ensure tube doesn't rip off. (This works well but needs explaining)
Then - Phew - The get a notched trowel. Make up some epoxy filler and smear it over the glass. Pull trowel across leaving beads. When all cabin covered - get 30mm thick scrap foam 1m long and 120mm wide - with 40 grit paper band sweep across the cabin - at 30-45 degrees to the length of the board.
When all is smooth fill in grooves with more filler. Then sand again with 80 grit. Then two coats of epoxy. When the second one just leaves a fingerprint roll on some high build primer. Then top coat.
There is more but this will get you started. Thicker foam is stiffer. Mine is 15 and 25mm but your boat is smaller and cabin smaller so 15 would probably be fine. Curves will help provide stiffness too.
Always welcome to come up to the lake and I can show you some more tricks.
cheers
Phil
Thanks heaps Phil. I will get started and hit you up for more advice once the hurdles appear. Legend...
So the rigger has quoted $325 to raise the boom and the lever arm for the rotating mast. Waiting on a quote for a full re-rig today. Now I just have to decide how high to set it before I can remove the old roof and start on the jig. The boom hovers about 5'6" off the deck and I am 6'3". So I was thinking if I make it 7'3" that will leave me 1 foot between my head and the boom when standing up straight on the deck.
I could then make the cabin roof 6'3" or thereabouts at its highest point and as you said, slope it down towards the sides and front (I may not need to go to 6'3" but its better to have the option as I only want to raise the boom once). Then I will have a single seat on a pedestal in the centre of the deck, that can see over the cabin like you said.
The luff of the main sail is 9.8m so I am not giving up any significant portion of sail area. I will get the sailmaker to reshape the top of the sail to account for the 21 inches of lost mast. Last time he did something like that for me it was about $200. He will also have to change the foot of the headsail but I can do that after the cabin is finished.
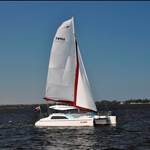
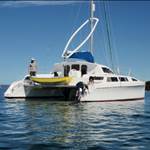
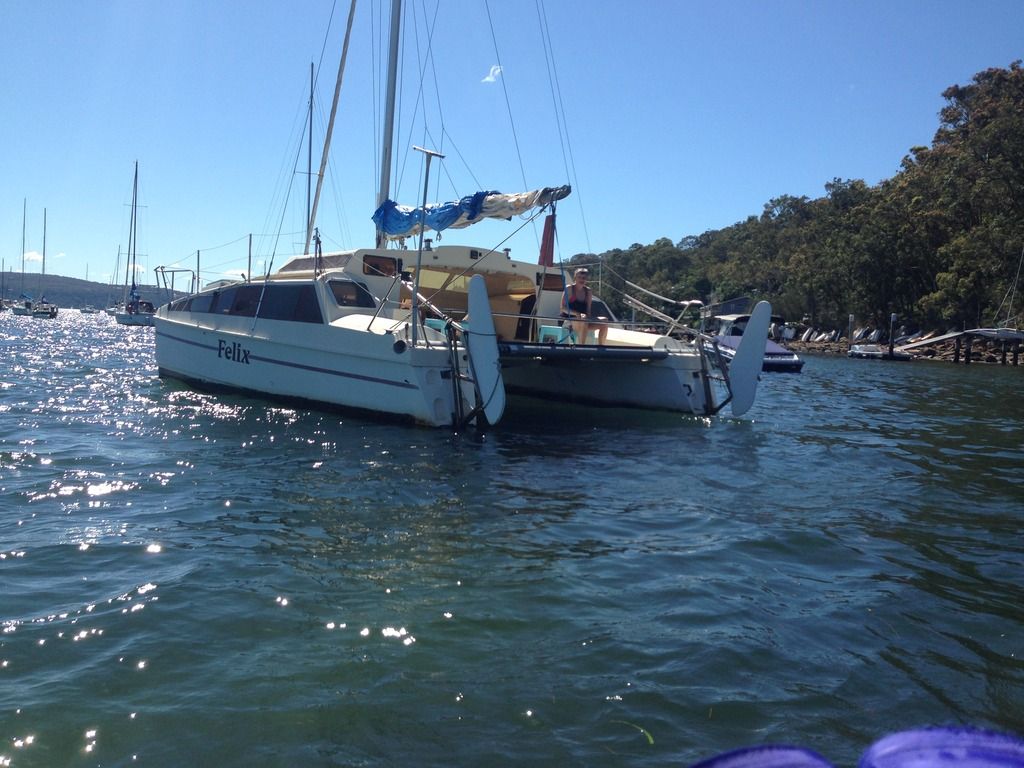
Below is some pics of the same model but with a higher cabin to show what I am trying to achieve. As you can see, my cabin is exposed to the elements and makes the bridgedeck uncomfortable to sleep on when its cold or wet.
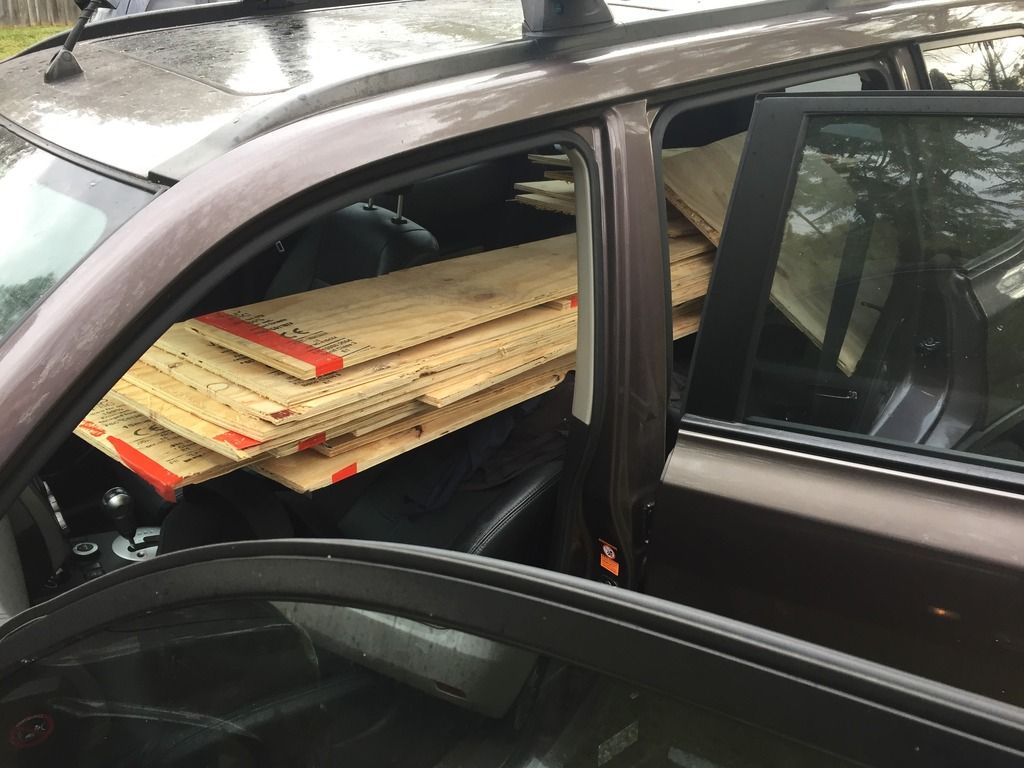
Last night I picked up my first load of free plywood off gumtree. Really good stuff. 17mm and nearly new. 2.6m long strips which is perfect. He is a business so when he has more shipping containers that need recycling he will let me know. Stoked about that quick win.
I've painted cars before so I have a good set of sanding blocks, air compressor, spray equipment, safety gear etc. I was thinking that this project would be a good candidate for spray filler as it gets pretty good results on car roofs etc. I have little experience with fibreglass but I guess that's the fun part of it. Learning new skills.
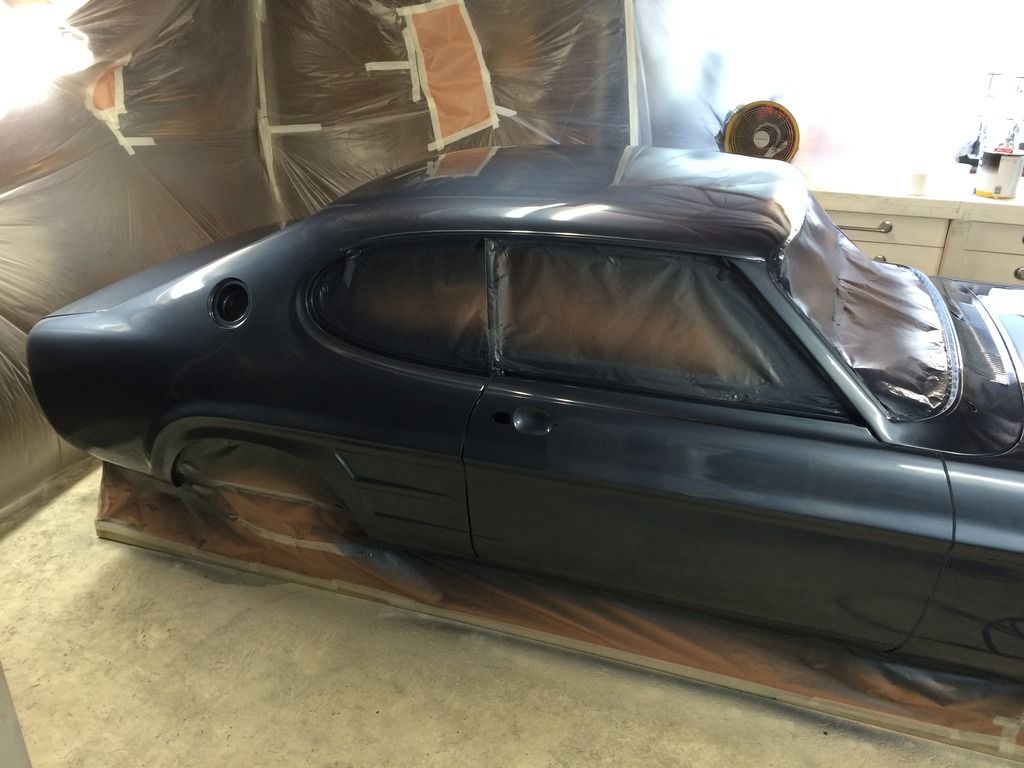
Below is a pic of the capri I finished last year. I swore I was finished with cars but looks like boats are not that different. So I am glad I kept all the gear. :)
"Yaringa". Same model but with higher, fully enclosed cabin roof
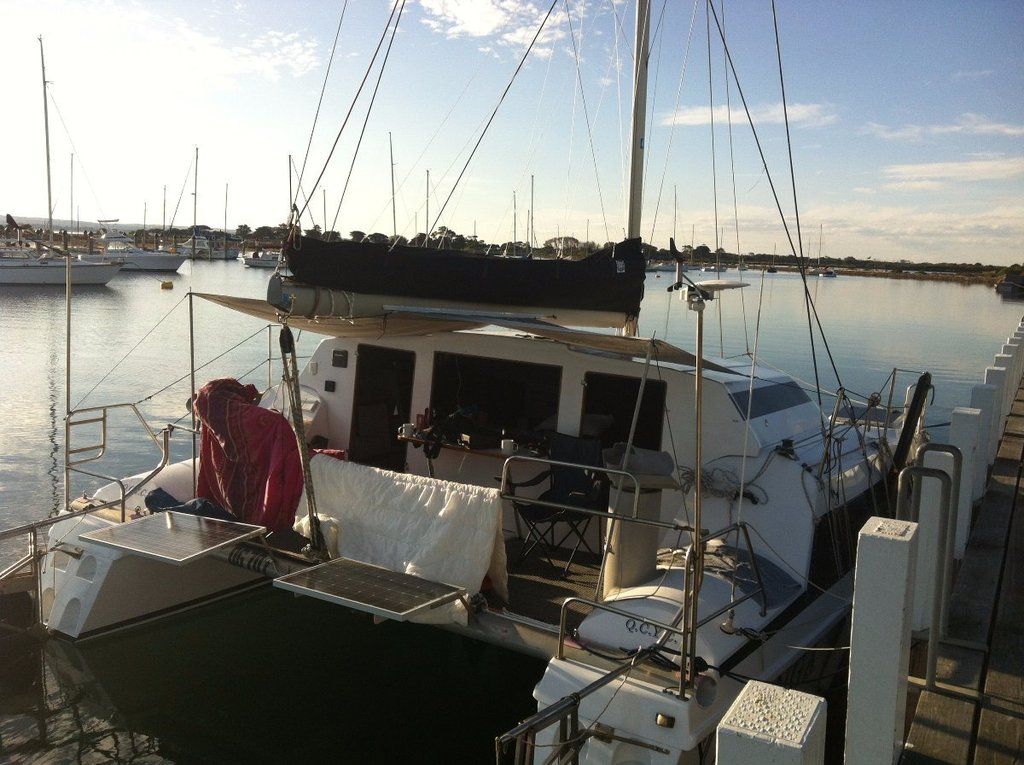

My boat
First load of free plywood.
My old Capri. I'd like to say I miss her.. But I don't.
Hey Felix, Nice boat. Remember the two biggest killers of boat speed, especially upwind, are weight and wind resistance.
Gday Felix
I didn't realise you already had an open cabin. I would be careful about making a new one much bigger. Reducing main size, adding windage and weight will all make the boat slower. So be clever.
In the pic of the bigger cabin they have extra volume at the front and side of the cabin - there is no need for this on a small boat that can't handle the windage. I would pull the cabin down here.
I wouldn't push the boom 1cm higher than needed. You may regret the sail area reduction. I would also look carefully at cutting the present cabin off exactly flat. This would make installation of the new cabin easier.
IIRC Bob Hotchkiss of Beach Marine made a lot of models. It is easiest to mould with flat ply so the present cabin shape is probably the result of limitations in mould material. I would rather a more rounded look than the sistership.
As to closing in the back - try and get both approaches. I have twin doors that remove and a centre window that slides down in front of the wheel. This lets outside become inside pretty easily. We rarely close up at night. So we can close up but usually are open.
Also think carefully about the winches. Some are painful to use on bridgedeck cats.
cheers
Phil
Yep all good advice.
I was only planning to bring the new roof aft by about 100mm just to include the engine cover so it can open and close without interference. Below is an old picture from when I first got the boat and was removing the old motor. I have drawn a line along the deck where the rear wall would go and marked where the pedestal might sit ("X" marks the spot). The door location is in yellow with the idea that the doors could swing in to the centre and fold against each other. The box/steps on either side would be retained but converted into hatches for cockpit stowage. This is really lacking at the moment and stuff just ends up floating around the cockpit.
But it's a fair point about the winches. You can see on Yaringa the winches have been moved to the top of the hulls. Not ideal I would guess on a small cat. Much less power generated by the head sail? I'm in touch with the previous owner of Yaringa (when it was pink and called "X-Rated") and ill try to find out how it performed.
So I will take the advice and I won't leap into this. BUT heres an idea... the old cabin top is just bolted on so if I really get keen, next winter I can unbolt the old lid, rest it upside down on the tramp/bows for a few days while I build my jig and then put the old cabin top back on while I work on the new roof in the workshop. That could work.
At lunchtime I got the bill from the marina and surveyor for all the recent work and it hit me for over $4k so I think I will take a slight back step and keep thinking about the best compromise. I doubt I can achieve it without raising the boom but it depends on how much performance I lose. My crew is made up of women and children so pretty much exclusively about comfort and fair-weather sailing. :)
Deck Layout with proposed wall location marked:

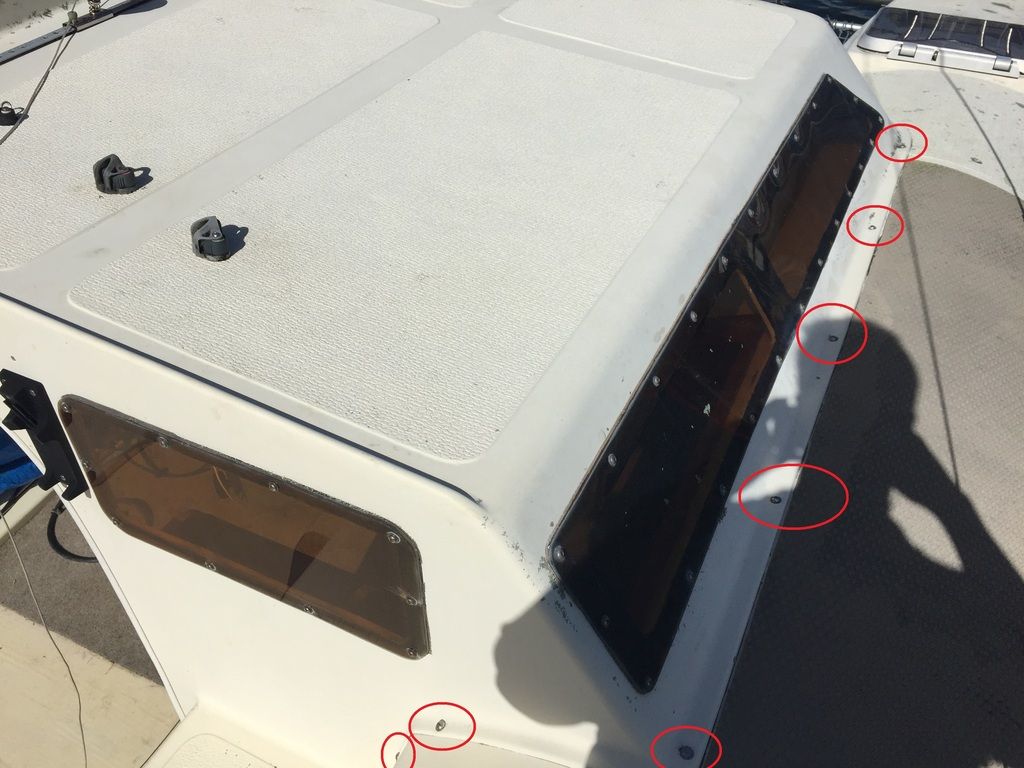
Roof bolts:
Select to expand quoteKankama said..
When I put a new cabin on Kankama I worked out where I needed sitting headroom and where I needed standing headroom. Standing only at the back, to go from side to side and at least sitting everywhere else. It has worked out well and I like the look.
So after more months trying to work out a design and more weekends of dealing with the low roof, and a sore back and knees, I have worked out this latest design. Its basically coming to terms with the fact that this boat is too small for a full height, closed in bridge deck.
Its a hard-top solution with clear plastic roll-down canopy for when the weather turns. Much like the below example from a Beach Marine Macro 31 (mine is a Macro 25). It involves cutting away the rear part of the existing roof (only 1.1m high!!!) so that there is clear air between the two companionways. Like you said, to go from side to side without crouching or worse, hands and knees. It leaves the front half of the saloon low and suitable for a "futon" along the width of it (no room for a dining table, sorry!)
I am a good stainless fabricator so the plan is that I will cut away the yellow section, install the winches to the sides and re-route the jib sheets with deck organisers. Then fabricate all the supports and install them, then make a template to sit atop the supports out of 12mm plywood and deliver it to the fabricator.
I have spoken to some local fibreglass makers/boat repairers and so far that plan seems to be satisfactory to them
There are a number of benefits to this design:
1. Less windage when the windows are rolled up.
2. Complete visibility from the helm as I can already see over the existing roof
3. Keeping part of the existing roof means I still have somewhere solid to stand when adjusting the outhaul or flaking/feeding the mainsail
4. No glassing needs to be done on the hardstand or mooring, taking weather and movement out of the equation.
5. The couch folding to a bed in the saloon is a neater solution than the existing solution which is just a bunch of foam cushions on the floor. Due to a lack of final design I havent done anything in that space. The "futon" will also give me storage in the saloon which I have none now.
6. Hard top will allow for solar panels over the helm where they wont get stepped on
7. As there will be a hard top over the helm I will be more sheltered than just a closed in saloon which offers me no protection against dehydration or rain
8. I will be able to attach the VHF and all other instrumentation to the ceiling within reach of the helm which I had no solution for before. Currently the VHF is in the galley where I can't even hear it. I rush over to hear it just as the message is ending.
Downside:
I lose about 40% of the length of the jib sheet tracks, therefore I think this will lose a small amount of performance when beating. But I would like some advice on this. How severe is the loss of the rear 40% of the jib sheet track likely to be on any given catamaran?
Thats really the only downside I can see.......


Maybe you would get away with moving tracks and winches out a bit and not cut as much out of roof. An aluminium frame would be lighter than a stainless one too.
Select to expand quoteAUS126 said..
Maybe you would get away with moving tracks and winches out a bit and not cut as much out of roof. An aluminium frame would be lighter than a stainless one too.
Yeah I thought about playing with the position of the tracks but I'm pretty sure that keeping the track where it is will keep the best airflow from jib to main. I can't cut away any less roof because I need to provide for the companionways, and cutting more has limited benefits so cutting at that point is the least I can do while still achieving the height goal.
The choice of stainless vs aluminium for the frame is simply down to experience. I've spent countless hours fabricating stainless. Once the new roof is delivered I will attach it to the timber frame and book a powered berth at the marina for a day so I can weld up the steel frame one corner at a time, and replace the timber frame with steel along the way. I'm confident I can do the whole job in one day but then I will have to send the steel frame off to have the welds pickled/electropolished. So a bit of a process but I will be saving a lot of money. Over getting it all done but pros
This weekend I threw up a temporary timber frame to support the roof once its made. In doing so I found the old roof has a balsa core along the top (solid GRP sides). So I will want to make the new hardtop roof out of some sort of buoyant core as well.
The inside headroom will be 195cm high at the back and 190cm at the front. I am awaiting a quote to give the go-ahead.
Also started working on the couch/bed for the saloon. So far so good on that front. Should be able to finish the frame this month and then get some cushions done. The carpet had to be ripped up anyway so ill need to lay new stuff.
Dont know how I will get the awnings made. Perhaps I will look for a mobile service who can visit the mooring for a measure-up.
Existing saloon balsa core roof section:
I dont think the height is too obtrusive from the front. Looks more intrusive from the side and rear but from the front it looks ok :)
Couch/bed thing for the saloon under construction. Its a low seat due to the low ceiling but at least its off the floor. Makes it much easier for adults to stand up from a sitting position.
Also gives a little bit of precious storage and will have actual back support unlike how it was before (the floor was just covered with thick open cell foam cushions)
New helm position taking shape. Its a standard whitworths unit but with a stainless frame to give support and also give space for a thick merbau foot rest. You can see over the low roof and steer with the tiller extension from either chair. And the tiller extension wont foul on the new roof support. The sheet winches will be moved to the side which also means I can install sheet bags (for empties) on the bulkhead.... yay.
Well the first quote came in at $8k which is higher than I thought but then again the guy really knows what he is doing. So it's a tough call. I need another quote.
Materials he quoted at 1.5k i could save a fair bit doing it myself but I could also make a huge mess
Does anyone know where to buy the foam core panels???
The other option is to forget fibreglass altogether and just make the steel frame and cover it with canvas. Still gives the benefits except buoyancy.
Select to expand quoteFelixdeCat said..
Well the first quote came in at $8k which is higher than I thought but then again the guy really knows what he is doing. So it's a tough call. I need another quote.
Materials he quoted at 1.5k i could save a fair bit doing it myself but I could also make a huge mess
Does anyone know where to buy the foam core panels???
The other option is to forget fibreglass altogether and just make the steel frame and cover it with canvas. Still gives the benefits except buoyancy.
Give thought to polycore for a curved top, you can use vinyl ester instead of epoxy - much more pleasant to use. The downside of polycore is not strength but flexibility. If you use 35 mm with 450 double bias you will not need any beam structure, it will be stiff enough and the weight will be way down. We built Lyra, a 12 meter cat entirely from polycore. Came in at 5.25 tons fully laden with 400 l water and 400 l fuel. Just beware of using vinyl ester for bog, better to use epoxy for that.
Select to expand quotePhoenixStar said..FelixdeCat said..
Well the first quote came in at $8k which is higher than I thought but then again the guy really knows what he is doing. So it's a tough call. I need another quote.
Materials he quoted at 1.5k i could save a fair bit doing it myself but I could also make a huge mess
Does anyone know where to buy the foam core panels???
The other option is to forget fibreglass altogether and just make the steel frame and cover it with canvas. Still gives the benefits except buoyancy.
Give thought to polycore for a curved top, you can use vinyl ester instead of epoxy - much more pleasant to use. The downside of polycore is not strength but flexibility. If you use 35 mm with 450 double bias you will not need any beam structure, it will be stiff enough and the weight will be way down. We built Lyra, a 12 meter cat entirely from polycore. Came in at 5.25 tons fully laden with 400 l water and 400 l fuel. Just beware of using vinyl ester for bog, better to use epoxy for that.
Ok thanks I will def look for a supplier for polycore.
I spoke to another guy who does biminis and Dodgers from his floating workshop on Pittwater. He said if I do a stainless frame he will cover it for $350 which means fibreglass is looking too dear for me at this time. If canvas doesn't last long enough then I can always do it in the future over the same frame. But for now it looks like i can only afford canvas all round with a clear plastic windscreen of some sort
he said clear plastic is heaps expensive and you can't roll it up like canvas cause it shrinks. So I could do Perspex at the front to match all the other Windows and do canvas the rest of the way around maybe.
Select to expand quoteFelixdeCat said..PhoenixStar said..FelixdeCat said..
Well the first quote came in at $8k which is higher than I thought but then again the guy really knows what he is doing. So it's a tough call. I need another quote.
Materials he quoted at 1.5k i could save a fair bit doing it myself but I could also make a huge mess
Does anyone know where to buy the foam core panels???
The other option is to forget fibreglass altogether and just make the steel frame and cover it with canvas. Still gives the benefits except buoyancy.
Give thought to polycore for a curved top, you can use vinyl ester instead of epoxy - much more pleasant to use. The downside of polycore is not strength but flexibility. If you use 35 mm with 450 double bias you will not need any beam structure, it will be stiff enough and the weight will be way down. We built Lyra, a 12 meter cat entirely from polycore. Came in at 5.25 tons fully laden with 400 l water and 400 l fuel. Just beware of using vinyl ester for bog, better to use epoxy for that.
Ok thanks I will def look for a supplier for polycore.
I spoke to another guy who does biminis and Dodgers from his floating workshop on Pittwater. He said if I do a stainless frame he will cover it for $350 which means fibreglass is looking too dear for me at this time. If canvas doesn't last long enough then I can always do it in the future over the same frame. But for now it looks like i can only afford canvas all round with a clear plastic windscreen of some sort
he said clear plastic is heaps expensive and you can't roll it up like canvas cause it shrinks. So I could do Perspex at the front to match all the other Windows and do canvas the rest of the way around maybe.
That sounds like Bruce in McCarrs Creek.
I am planning something similar on my wharram cat. Alloy frame and then 6mm ply glassed for the roof,not as light or stiff as foam but easy and cheap, means I can stand on it carefully and also mount solar panels and catch water.
curtain or perspex front and sides will come later, weight is definitely an issue on a cat though and it all adds up.
Select to expand quotesamsturdy said..
That sounds like Bruce in McCarrs Creek.
Correct!! He is a super helpful guy. I spoke to him again and I am pretty keen on the bimini/dodger option.
----Cost is within my reach
----No time spent learning to work with GRP/core panels (no risk of errors either, no smells coming from the garage for my wife to complain about)
----I can make it more aerodynamic than a solid roof
----I can bend the steel myself and the fittings can be bought online (no need to take the boat to a Marina and weld anything together, and no need to send the frame for pickling/electopolishing afterwards).
----The flexible clear panels at the front can be unzipped and removed to lower wind resistance when underway. I would do this whenever the weather is good. He said its best not to roll them up but can be unzipped and stowed.
----I can still attach instruments to the inside frame
----Not sure about solar panels but this was never a major issue for me. Only need 2 small 10 watt units to keep batteries charged.
----If I get the design wrong, I can make adjustments to the solution with manageable expense.
----Easy to include some small clear windows in the ceiling so I can see the sail shape easily
----Potentially I can put the winches inside the dodger and feed the lines through, further improving aero-shape and access to winches.
Downsides:
----Needs to be replaced every few years (not ideal but you cant have it all)
----Cant walk on it (no big deal)
Select to expand quoteFelixdeCat said..samsturdy said..
That sounds like Bruce in McCarrs Creek.
Correct!! He is a super helpful guy. I spoke to him again and I am pretty keen on the bimini/dodger option.
----Cost is within my reach
----No time spent learning to work with GRP/core panels (no risk of errors either, no smells coming from the garage for my wife to complain about)
----I can make it more aerodynamic than a solid roof
----I can bend the steel myself and the fittings can be bought online (no need to take the boat to a Marina and weld anything together, and no need to send the frame for pickling/electopolishing afterwards).
----The flexible clear panels at the front can be unzipped and removed to lower wind resistance when underway. I would do this whenever the weather is good. He said its best not to roll them up but can be unzipped and stowed.
----I can still attach instruments to the inside frame
----Not sure about solar panels but this was never a major issue for me. Only need 2 small 10 watt units to keep batteries charged.
----If I get the design wrong, I can make adjustments to the solution with manageable expense.
----Easy to include some small clear windows in the ceiling so I can see the sail shape easily
----Potentially I can put the winches inside the dodger and feed the lines through, further improving aero-shape and access to winches.
Downsides:
----Needs to be replaced every few years (not ideal but you cant have it all)
----Cant walk on it (no big deal)
Just a thought Felix....the clears are a problem because of their exposure to sunlight. Maybe Bruce can put a zip on
cover over the clears for when the boat is moored. Got to be cheaper than constantly replacing the clears.
Select to expand quotesamsturdy said..
Just a thought Felix....the clears are a problem because of their exposure to sunlight. Maybe Bruce can put a zip on
cover over the clears for when the boat is moored. Got to be cheaper than constantly replacing the clears.
Excellent idea. A good investment at the start i think.
I did read somewhere that covers for the clears are made from a softer UV fabric so it wont scratch the clears.
I am going to send bruce some drawings to see if he generally approves of the frame before I get started. But I can order the pipe, pipe bender and some fittings today. Here's a very rough draft.

Maybe he can make the cover out of the tough stuff and line it with something soft. BTW Bruce does or did have
the machinery to bend stainless tubing so just check with him before you go ahead. Your drawing looks OK to me.
Its nice to be able to catch the rain water maybe not for drinking if you dont clean the roof area
but every thing else would be good
a small hose after its clean add the hose to a 20 litre drum keep you out there
you could used western red cedar in a strip form and cover with glass mat Bit like making a cedar hull over a mould
www.4wdsupacentre.com.au/products/awnings/2-5-x-2-5m-kings-side-4wd-awning-upf-50-waterproof-incl-mounting-kit.html
and roll it up when your not there $99
So its been a learning curve withbending the tube. What a pain in the ***
I don't know why I fall into the trap of thinking I can buy a machine for an intended purpose and it will actually do what it is supposed to!![]()
The pipe bending machine needs a lot of convincing to do what its supposed to do.
Of course I have now learnt that tube and pipe are different things![]()
The first attempt with some scrap went really badly with a total kink of the pipe. (Yes I packed it with sand first). (pic 1 below)
I chucked a tanty cause it was a hot day and I thought I had just wasted a bunch of money.
But after thinking about it I realised that I could improve the result by using a smaller die on the machine (25mm instead of 38mm) and also packing cloth in the die to create a snug fit. (pic 2 below)
It still wasn't good enough because the top of the tube was flat and the inside was rippled with excess material.
A day later I realised the solution was to expand the radius that I was trying to achieve and do a series of small bends rather than one big one this produced a better overall result, but still needs some work. You can see in the 3rd pic I rushed it towards the end and created some flat spots. The rollers on the machine also leave dents on top of the tube so I will need to shim the rollers with some PVC tube or something to spread the pressure out more.
I was using a 38mm piece with 1.8mm side wall I had on hand, while for the actual frame I will use 2.2mm side wall. This should further improve the work-ability of it, and reduce the tendency to dent on the rollers. It needs to be 2.2mm because I have decided to go with the radar arch with traveller on top. So the extra strength is needed.
Meanwhile the fittings have arrived and I bought loads of cheap plastic electrical conduit to make the prototype out of. The stainless fittings fit nicely on the conduit so it should be a good solution.
The fun continues.
Machine I am using:

Attempt 1: BAAAAD

Attempt 2: Slight improvement

Attempt 3: Getting there

Select to expand quoteFelixdeCat said..
So its been a learning curve withbending the tube. What a pain in the ***
I don't know why I fall into the trap of thinking I can buy a machine for an intended purpose and it will actually do what it is supposed to!![]()
The pipe bending machine needs a lot of convincing to do what its supposed to do.
Of course I have now learnt that tube and pipe are different things![]()
The first attempt with some scrap went really badly with a total kink of the pipe. (Yes I packed it with sand first). (pic 1 below)
I chucked a tanty cause it was a hot day and I thought I had just wasted a bunch of money.
But after thinking about it I realised that I could improve the result by using a smaller die on the machine (25mm instead of 38mm) and also packing cloth in the die to create a snug fit. (pic 2 below)
It still wasn't good enough because the top of the tube was flat and the inside was rippled with excess material.
A day later I realised the solution was to expand the radius that I was trying to achieve and do a series of small bends rather than one big one this produced a better overall result, but still needs some work. You can see in the 3rd pic I rushed it towards the end and created some flat spots. The rollers on the machine also leave dents on top of the tube so I will need to shim the rollers with some PVC tube or something to spread the pressure out more.
I was using a 38mm piece with 1.8mm side wall I had on hand, while for the actual frame I will use 2.2mm side wall. This should further improve the work-ability of it, and reduce the tendency to dent on the rollers. It needs to be 2.2mm because I have decided to go with the radar arch with traveller on top. So the extra strength is needed.
Meanwhile the fittings have arrived and I bought loads of cheap plastic electrical conduit to make the prototype out of. The stainless fittings fit nicely on the conduit so it should be a good solution.
The fun continues.
Machine I am using:
Attempt 1: BAAAAD
Attempt 2: Slight improvement
Attempt 3: Getting there
defiantly the wrong type of bender,you need one that rolls the bend,how ever i have had good results using a leather welders glove in the dye , it wont let the pipe slip , also get some pipe and split it and put some leather around it to spread the load at the rollers ,a mans toy shop sell tube bender,s at a good price
Select to expand quotegrich62 said..a mans toy shop sell tube bender,s at a good price
Please...... do elaborate. As long as its suitable for public consumption ![]()
Don't waste money on tools, just send a drawing to Carrington Products. They will bend tight radius with a mandrel bender and roll the big radius. If it was 1" tube you might get away with doing it yourself. I'm a fabricator so usually weld in radius bends for 38mm tube but this isn't practical for you because yet more tools are required to polish welds. I haven't used a pipe bender for 20 years.
Select to expand quoteFelixdeCat said..grich62 said..a mans toy shop sell tube bender,s at a good price
Please...... do elaborate. As long as its suitable for public consumption ![]()
a proper tube bender will hold the tube at the start of the bend and form it around to the finish,if you are going to use the pipe bender use leather in the center dye and spread the outer load as much as you can over the tube at the rollers ie a split tube over the in side tube and the rollers as close as you can to the bend . i really recommend a proper bender for good outcome, love the beach marine cat by the way ,bridge deck clearance has always been my problem with them i hope this is the answer for you
Select to expand quoteFelixdeCat said..
So its been a learning curve withbending the tube. What a pain in the ***
I don't know why I fall into the trap of thinking I can buy a machine for an intended purpose and it will actually do what it is supposed to!![]()
The pipe bending machine needs a lot of convincing to do what its supposed to do.
Of course I have now learnt that tube and pipe are different things![]()
The first attempt with some scrap went really badly with a total kink of the pipe. (Yes I packed it with sand first). (pic 1 below)
I chucked a tanty cause it was a hot day and I thought I had just wasted a bunch of money.
But after thinking about it I realised that I could improve the result by using a smaller die on the machine (25mm instead of 38mm) and also packing cloth in the die to create a snug fit. (pic 2 below)
It still wasn't good enough because the top of the tube was flat and the inside was rippled with excess material.
A day later I realised the solution was to expand the radius that I was trying to achieve and do a series of small bends rather than one big one this produced a better overall result, but still needs some work. You can see in the 3rd pic I rushed it towards the end and created some flat spots. The rollers on the machine also leave dents on top of the tube so I will need to shim the rollers with some PVC tube or something to spread the pressure out more.
I was using a 38mm piece with 1.8mm side wall I had on hand, while for the actual frame I will use 2.2mm side wall. This should further improve the work-ability of it, and reduce the tendency to dent on the rollers. It needs to be 2.2mm because I have decided to go with the radar arch with traveller on top. So the extra strength is needed.
Meanwhile the fittings have arrived and I bought loads of cheap plastic electrical conduit to make the prototype out of. The stainless fittings fit nicely on the conduit so it should be a good solution.
The fun continues.
Machine I am using:
Attempt 1: BAAAAD
Attempt 2: Slight improvement
Attempt 3: Getting there
you could fill the tube with sand first plug both end and then bend
Im over it went to a doctor for a flue inject months ago and have been crook ever since
I cant do any thing till the weather warms up and you get more than one good day.
The bloody Fed Gov and the $6 flu injection which does not work and makes you sick
When I was bending pipe, a long time ago, I had to buy annealed tube. Would this be the way now still?